Day Twentyfourth Thirtyfirst
decemberadventure24Day Twenty Fourth to Thirty First
Psion Hacking - Bluetooth on a Psion Series 5
tldr
- Added a Bluetooth Low Energy/Serial module to a Psion Series 5 by directly connecting it to the internal serial lines before the RS232 converter
- Connected the Psion to my Macbook wirelessly, transfered files via y-modem and setup a PPP connection to browse local files using FTP and local html pages.
Long Read
I’ve been slowly hacking up one of my Psion Series 5 PDA’s, in previous posts I identifed an issue with the button that turns the CF card on/off and moved this to a new switch at the front of the device. To find space for this I removed the media buttons as I don’t plan to ever use them - this opened up a reasonable amount of space that could be used for other hardware upgrades. The Psion Series 5 (S5) is probably the best PDA ever made (okay the 5mx is better but I don’t have one of those) and while its keyboard and design hasn’t been surpassed it is lacking in builtin connectivity (beyond a RS232 cable and IrDA), being able to use the device ‘wirelessly’ seems great.
The plan was therefore to connect a blueooth module to the S5 and use this to exchange data including setting up a network connection. After a bit of research I found the HC-05 module which is has been used for a number of years by hobbyists for simple wireless links for robotics. This is a cheap bluetooth 2.0 module which by default provides a serial data link at 9600 baud and can be configured using AT commands (at a different baud rate when a pin is pulled low). I ordered 2 from ebay for about £10 (always order 2 as I find that you will break at least one of them).
Tracking Down Lines
While waiting for the delivery of the HC-05 I spend a while trying to identify the serial lines on the back of the S5’s PCB. My initial plan was to work backwards, it was easy to identify the RS232 Converter (its a MAX3212 IC on the keyboard side of the PCB) and using the datasheet I could start to follow the traces. It became clear that while the output lines that extended to the honda connector were easy to follow the input lines were less obvious. Also to access the MAX3212 I had to take the S5 apart which included disconnecting some of the fragile flex connectors - this was something I didn’t really enjoy as there was a significant risk it wouldn’t all fit back togther. Using a multimeter and also a Saleae Logic Analyser I attempted to identify the psion side traces to the MAX3231, these traces tracked underneath the IC rather than away from it and as I didn’t want to lift the IC I spent (too much) time trying to work out which of the test pads and vias on the back of the PCB lined up with the IC’s pins. In the end I wasn’t able to properly work it all out so had to find an alternative method.
I was able to find the S5’s CPU datasheet on archive.org and using the pin diagram was able to follow the PCB traces out of the CPU.
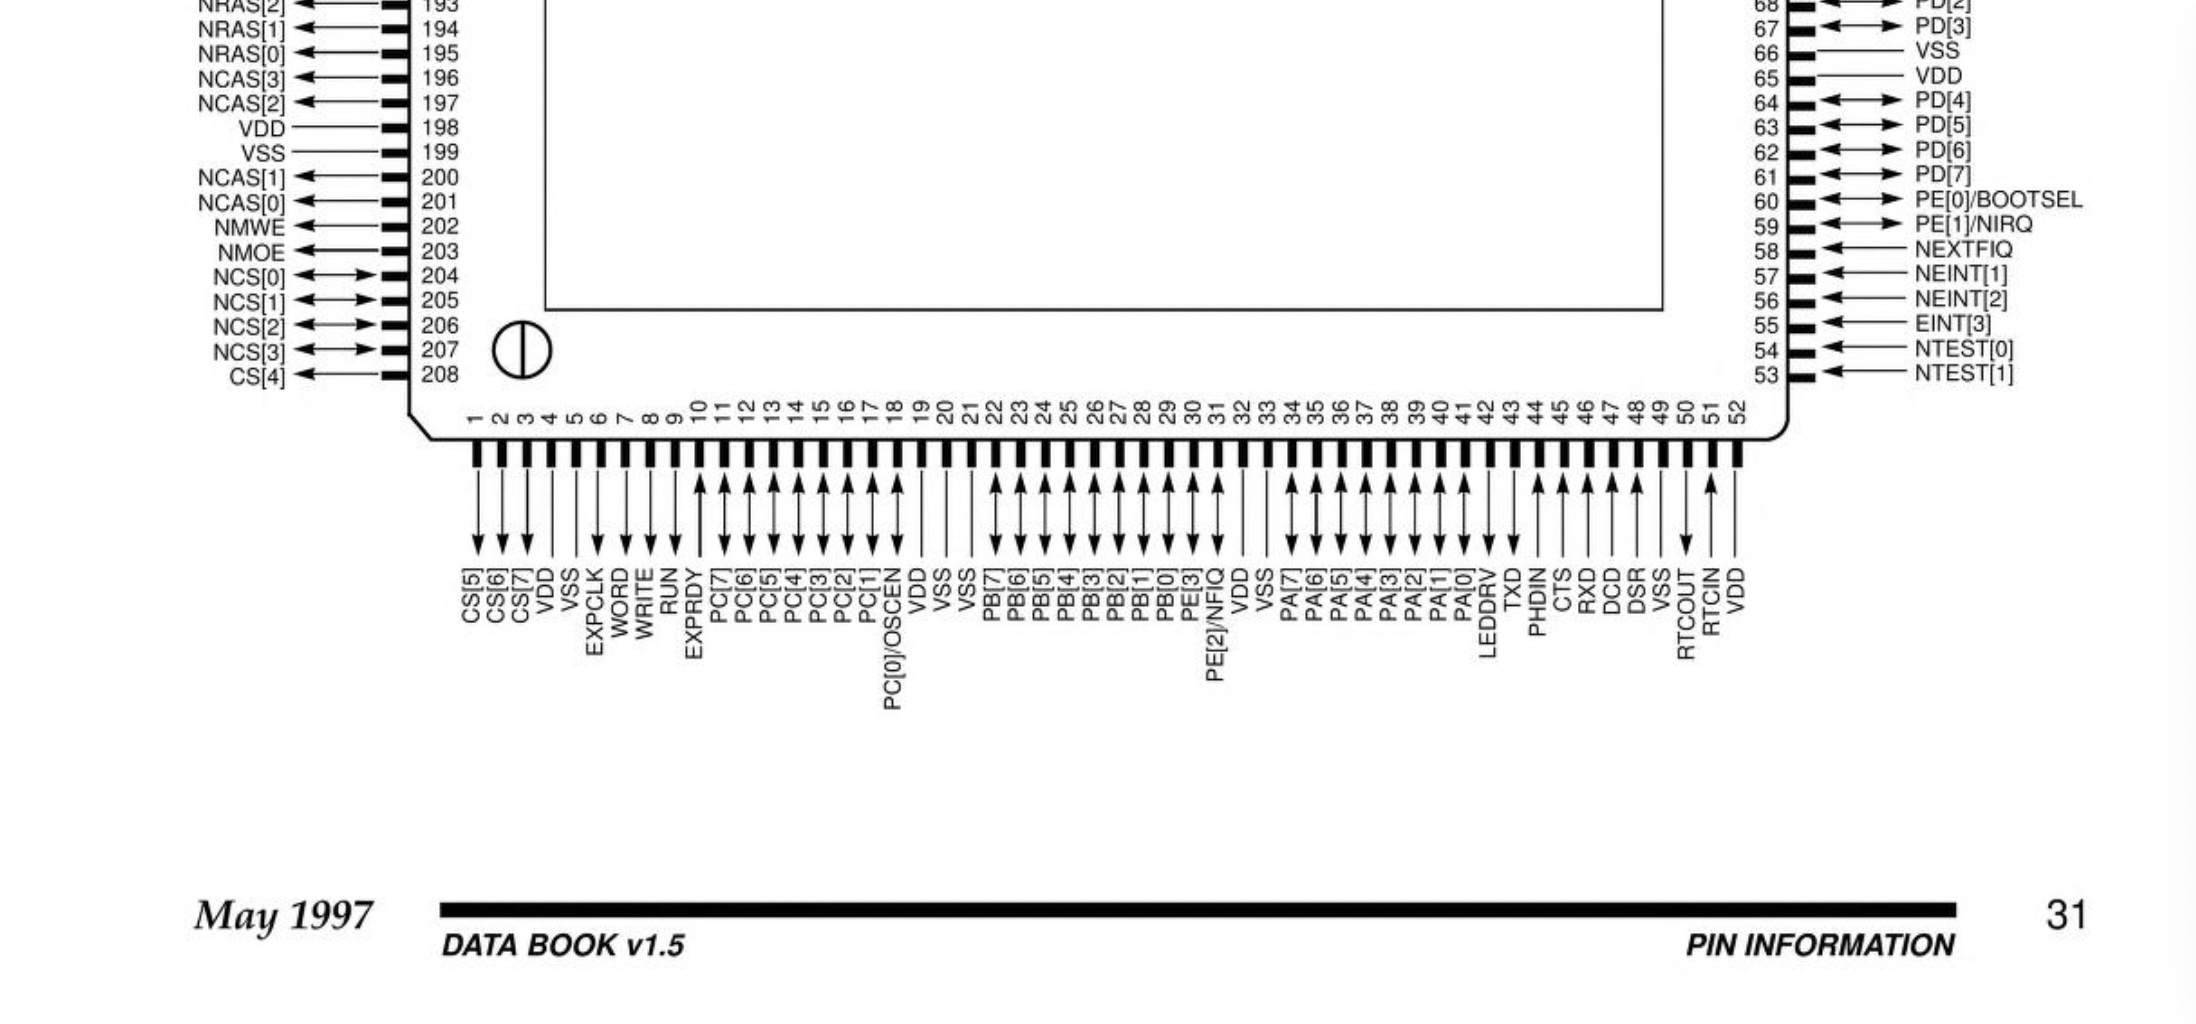
With a little bit of multimeter probing I was able to map out the path of TXD and RXD lines and find a test pad for each line which could be soldered to. Using the logic analyser I was able to decode some serial output to confirm the TXD line.
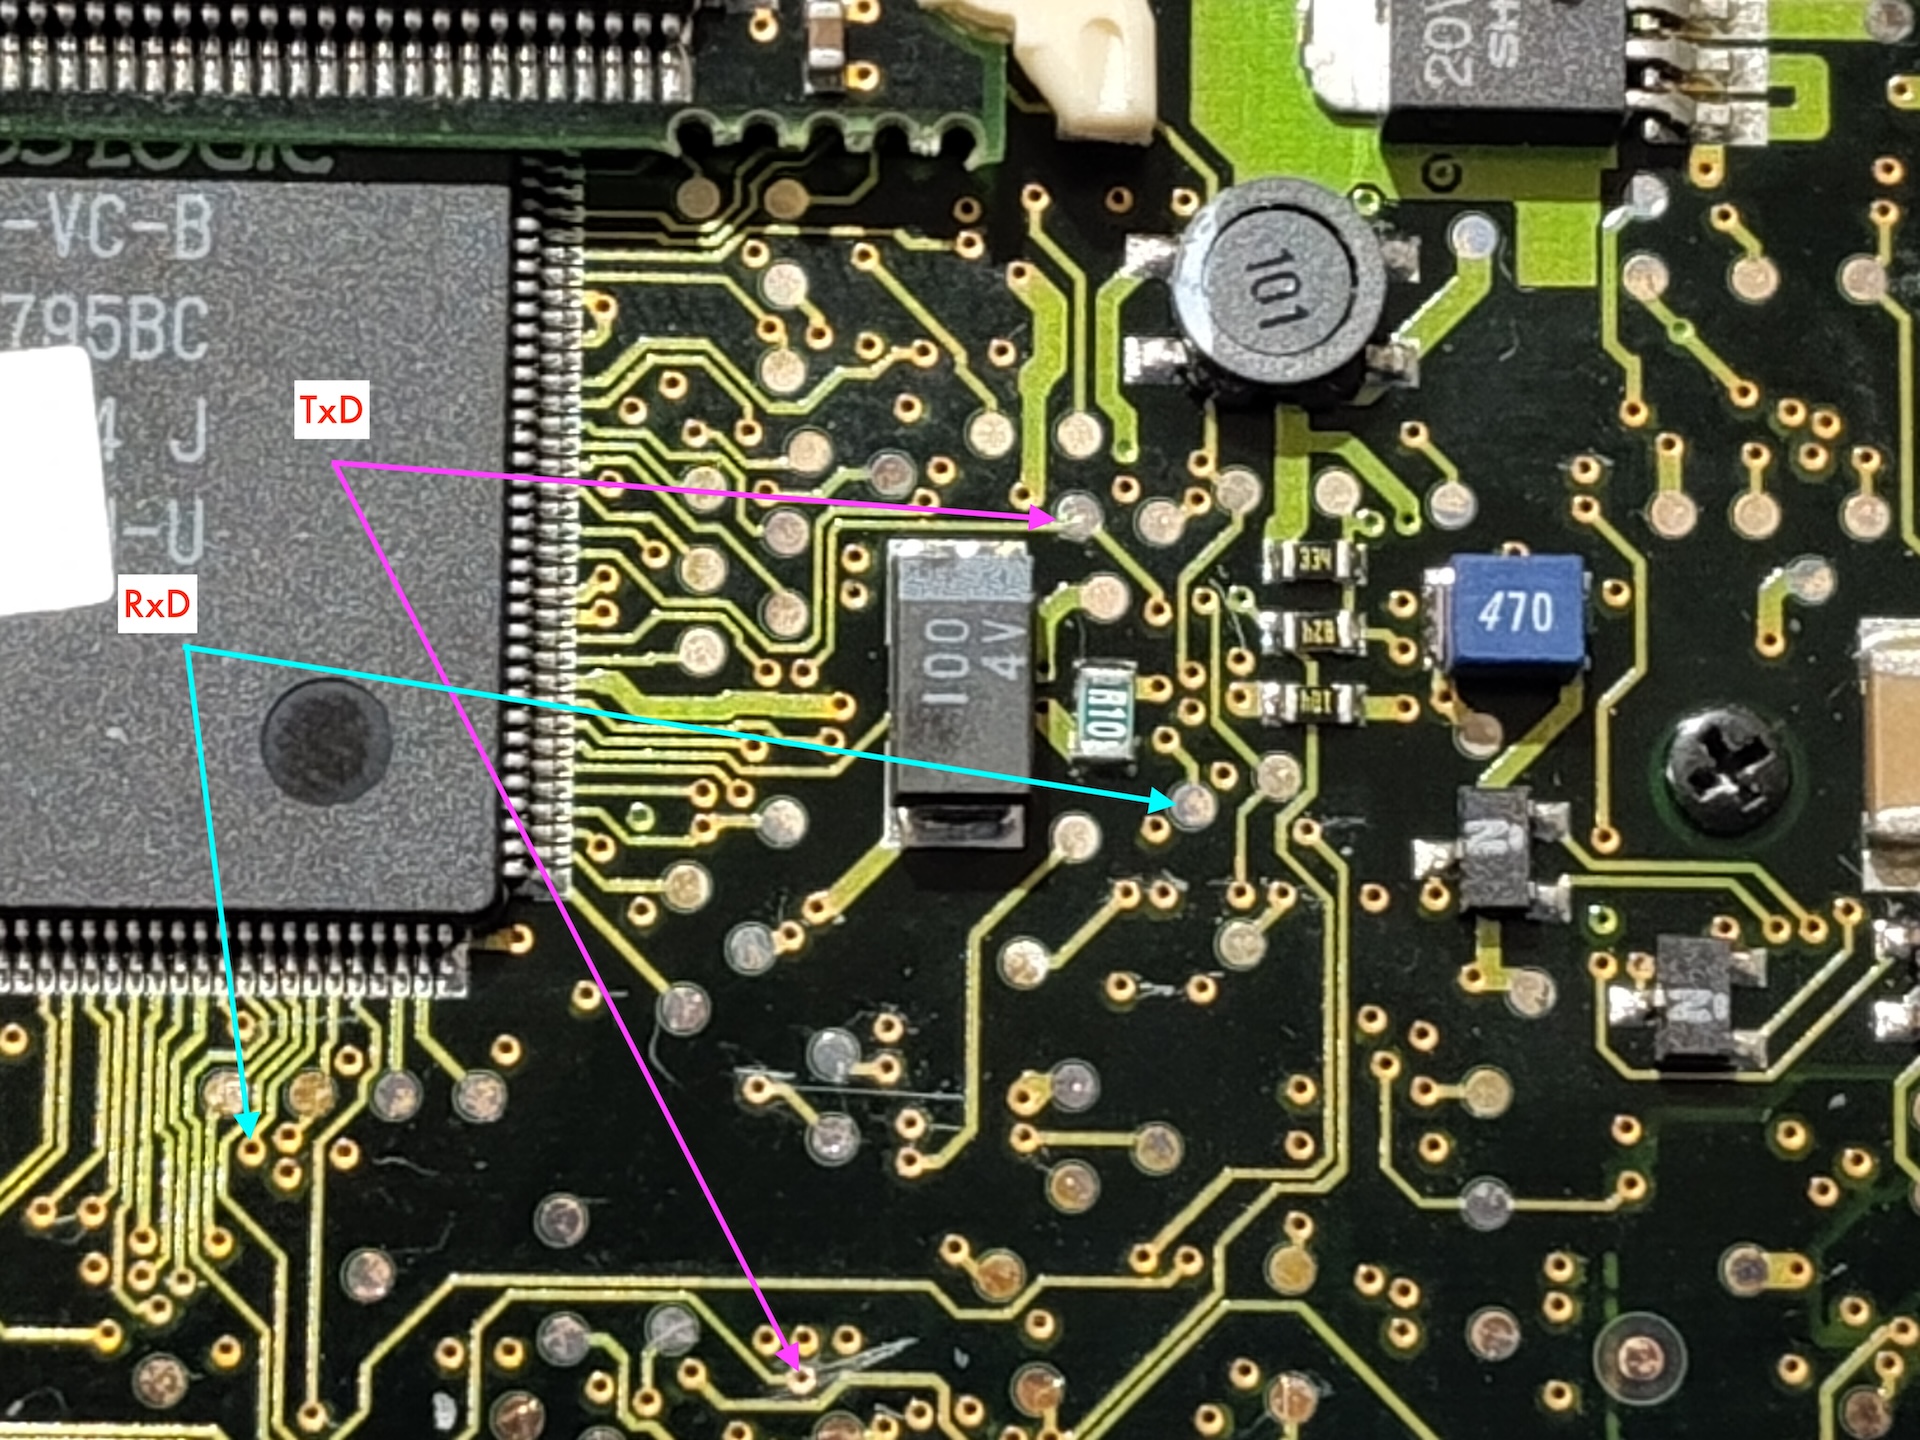
As both pads were on the back of the PCB (known as the CPU side) it meant that I could reassemble the S5 and wouldn’t need to fiddle with 28 year old flex cables again. With a bit of careful soldering I was able to add wires to these pads as well as identifying a ground point and also connecting to a power supply (initially I tried using a test pad I had identifed but in the end switched to directly attaching to the main batteries). To make things easier instead of wiring directly to the HC-05 I glued a small 1.27mm header with 4 sockets which I recovered from my junk box.
Using a HC-05
I then added a 1.27mm 4 pin header to the HC-05 with slightly too long wires for simple testing.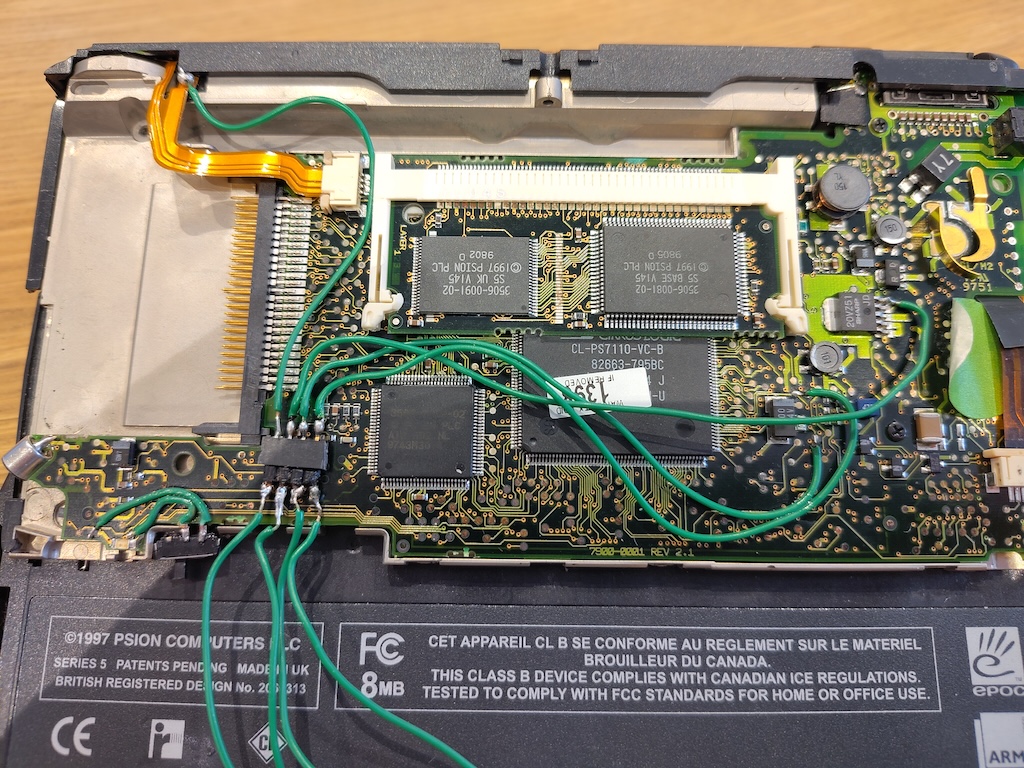
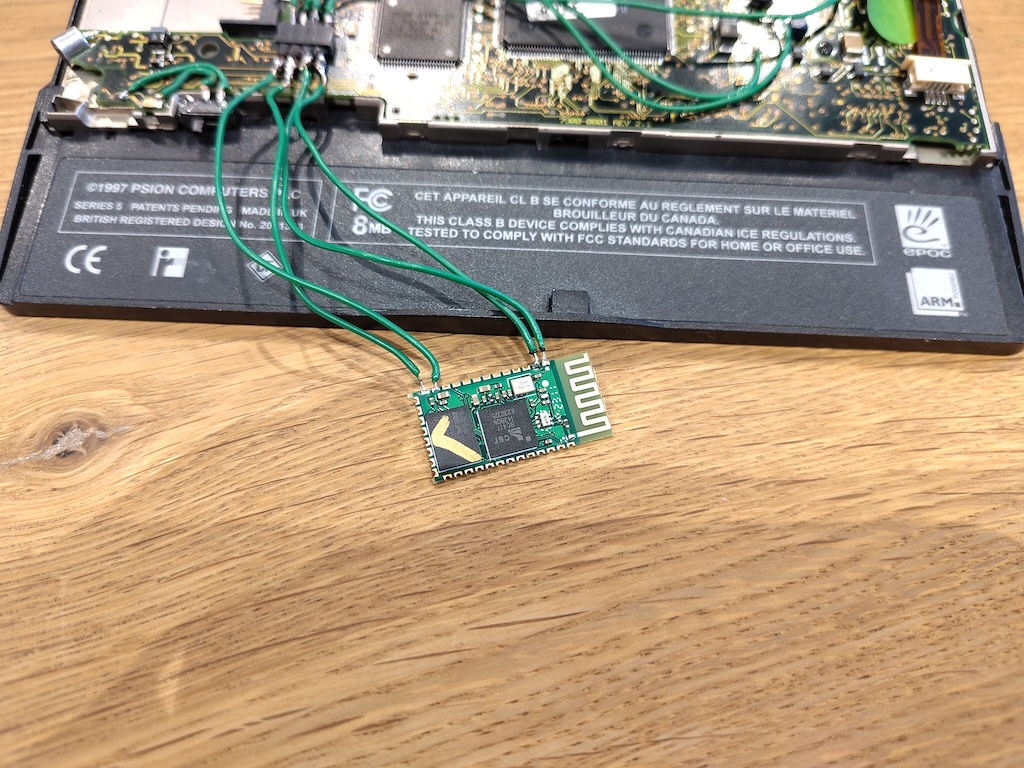
Now the hardware was setup it was time to do some proper testing, I was able to quickly see that the HC-05 had powered up as it appeared as a device on my Macbook (just a side note Apple have hidden the actually useful features in the Bluetooth Settings section, if you use Option-Shift when selecting Bluetooth in the sidebar you’ll actually be able to forget devices, this is the same for the bluetooth icon in the top bar). Once paired the blueooth device could be accessed as a serial port /dev/tty.HC-05 which I connected to using kermit. I was then able to open up the Comms app on the S5, set the baud rate to 9600, turn off hardware flow control and was able to send data between the devices via bluetooth.
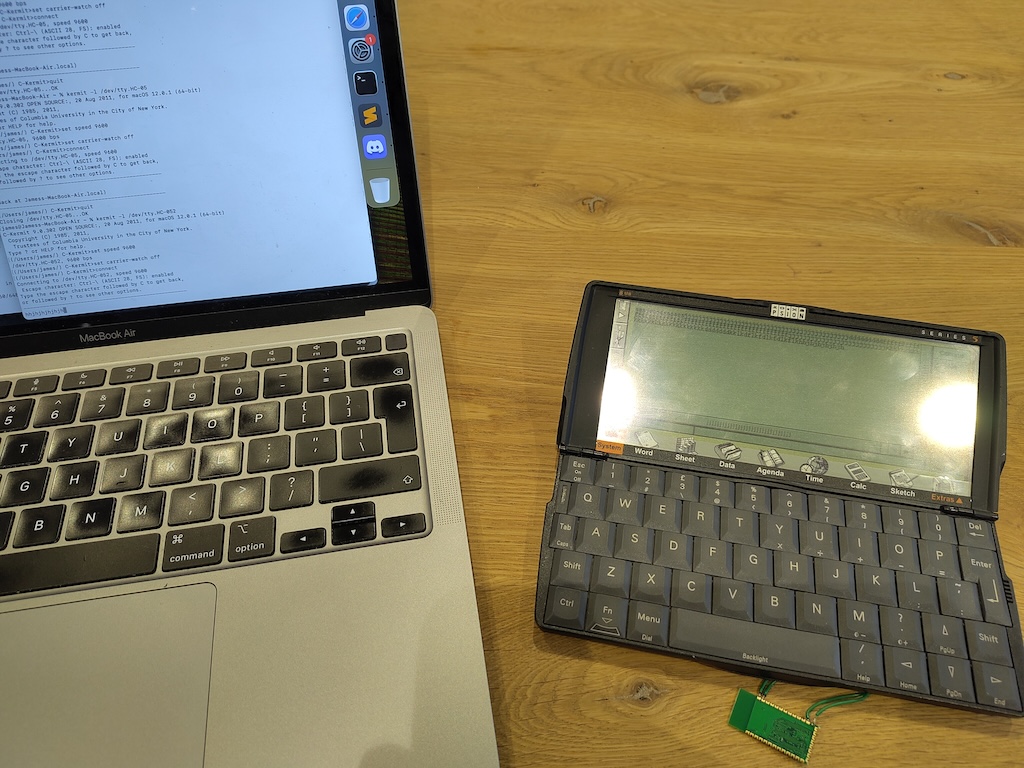
It became clear that the setup was really unreliable, the pairing didn’t always work, the connection seemed to go stale. With a little bit of investigation it became clear that the issue was the power supply to the HC-05, the datasheet reports that it can work at “low voltage (3.1V~4.2V)”, the batteries on my S5 were at 2.7V and while the Psion is happy with this the HC-05 was not. Switching in some new batteries improved the reliability however it wouldn’t be very sustainable as you would only be able to use bluetooth for a small percentage of the standard battery life.
Using a HM-11
In my initial research I had come across some newer versions of the HC-05 and found the HM-10 and HM-11.

The HM-11 was particularly interesting, it could work at lower voltages, its based on the more modern Bluetooth Low Energy (BLE) technology and also was significantly smaller. I ordered a HM-11 for about £10 (taking a risk by ordering only 1!) and when it arrived stole the small header from the HC-05 and soldered it on (with much shorter wires).
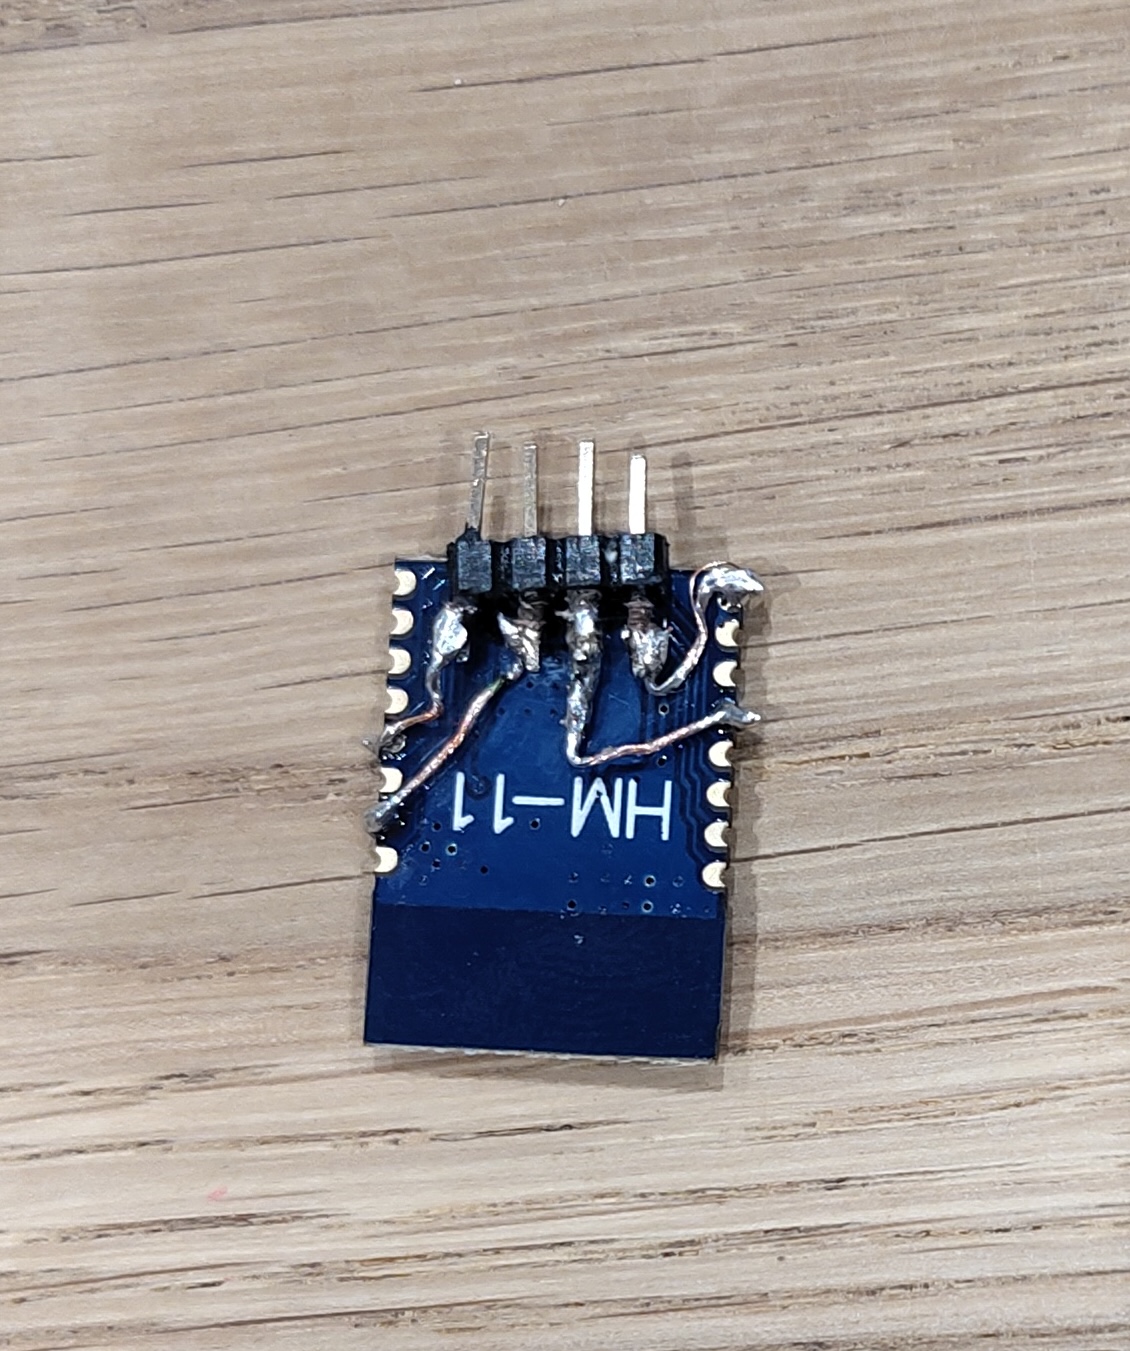
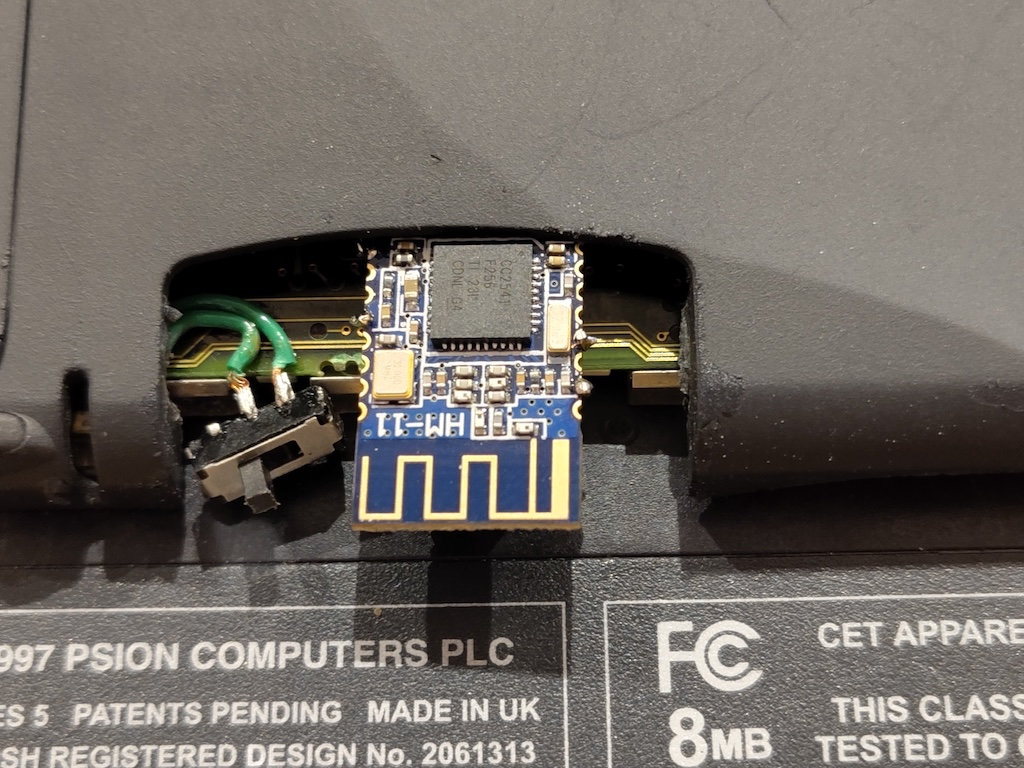
Thankfully as I had added the header for testing it was easy to just plug in the new module. The board does stick out a little bit and it would probably be possible to turn it sideways and it would fit into the gap but for testing it was fine. Also when you open the S5 the keyboard slides forward covering the module so its hidden away.
Setting up the software
The HM-11 in theory is a direct drop in for the HC-05, from the S5’s point of view its just a serial port, on the macbook’s side it appears a new bluetooth device. It however does not automatically add in a serial port to use (as the device has more features). Instead I was able to get this feature using ble-serial, this was very simple to setup. Once installed you just scan for BLE devices using ble-scan, I was able to identify the HM-11 device and its UUID and then connect to it using ble-serial -d D23FD702-D116-4741-5728-4CEA2B3296E9. This setup a serial device for me to use (at /tmp/ttyBLE and /dev/ttyS001) which I could then connect to using kermit. On a side note it was interesting to see how many other BLE devices there were around my house that appeared on the scan.
Now I had a reliable link I first tested out transfering some files, initially I had a few issues getting y-modem to work so used x-modem but this wasn’t very reliable and I had a number of file corruptions. After a bit of internet research I was able to get y-modem transfer working. From this blog I learnt how to use screen to access a serial port and then execute another program. Instead of using x-modem I modified my upload command and used
screen -L /dev/tty.S001 9600
Ctrl-A : exec !! lsz --ymodem <filename>
It turns out that I have a early S5 which doesn’t have the later OS version which makes it harder to install new programs, therefore the first thing to transfer over is instexe.exe which adds the Add/Remove code to the control panel, I’ve archived instexe.exe here for easy access. I found a nice guide to installing.
Next I tansferred over MSGSUITE.SIS Psion Software Index which installs key programs like a web browser, email program but more importantly the network implementations. Please note that transferring at 9600 baud is very very slow!
Once installed I could then run a PPPD server on my macbook
sudo pppd -detach local debug noauth passive /dev/ttys001 9600 10.0.0.1:10.0.0.2
And on the S5 setting it up as a direct cable connection modem I could then use the web browser to browse a web page hosted on my macbook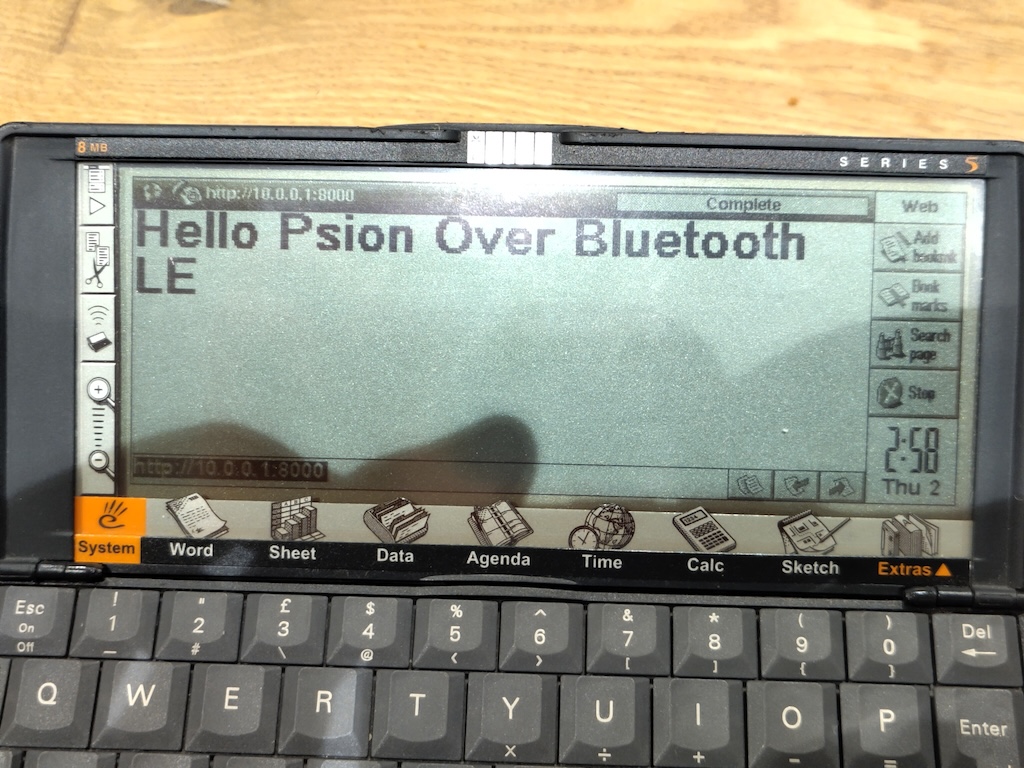
Next Steps
- I currently can’t seem to get a proxy server working on my macbook to allow the S5 to browse the web (such as using frogfind), I’ve used apps like SquidMan and TinyProxy and can setup the proxy but it seems that the data isn’t being transferred and the connection is being closed between the proxy and the S5 - currently looking at Wireshark to understand more.
- Currently this is running at 9600 baud which is a bit slow. My plan is to increase the speed using AT commands to the HM-11 (once I work out how) and see how it goes. Without hardware flow control this could be interesting. It would be possible to identify the control lines with the same techniques and the HM-11 claims to have control pins so that could be another option.
- The HM-11 should have good power saving features, just need to see how they work
- Design and 3d Print a cover for the gap that I’ve made which could accomodate the HM-11, could be a catridge-like system perhaps.
- Try other devices, I’ve got some small GPS modules that might also work.